实验: 部署Java 用
在本章,我们将使用CodeDeploy部署将新版本的应用部署到EC2 ASG(自动伸缩组)下面
并且,当触发扩容,新的EC2被添加到ASG下面时,CodeDeploy可以将应用自动部署到新创建的EC2上
原理
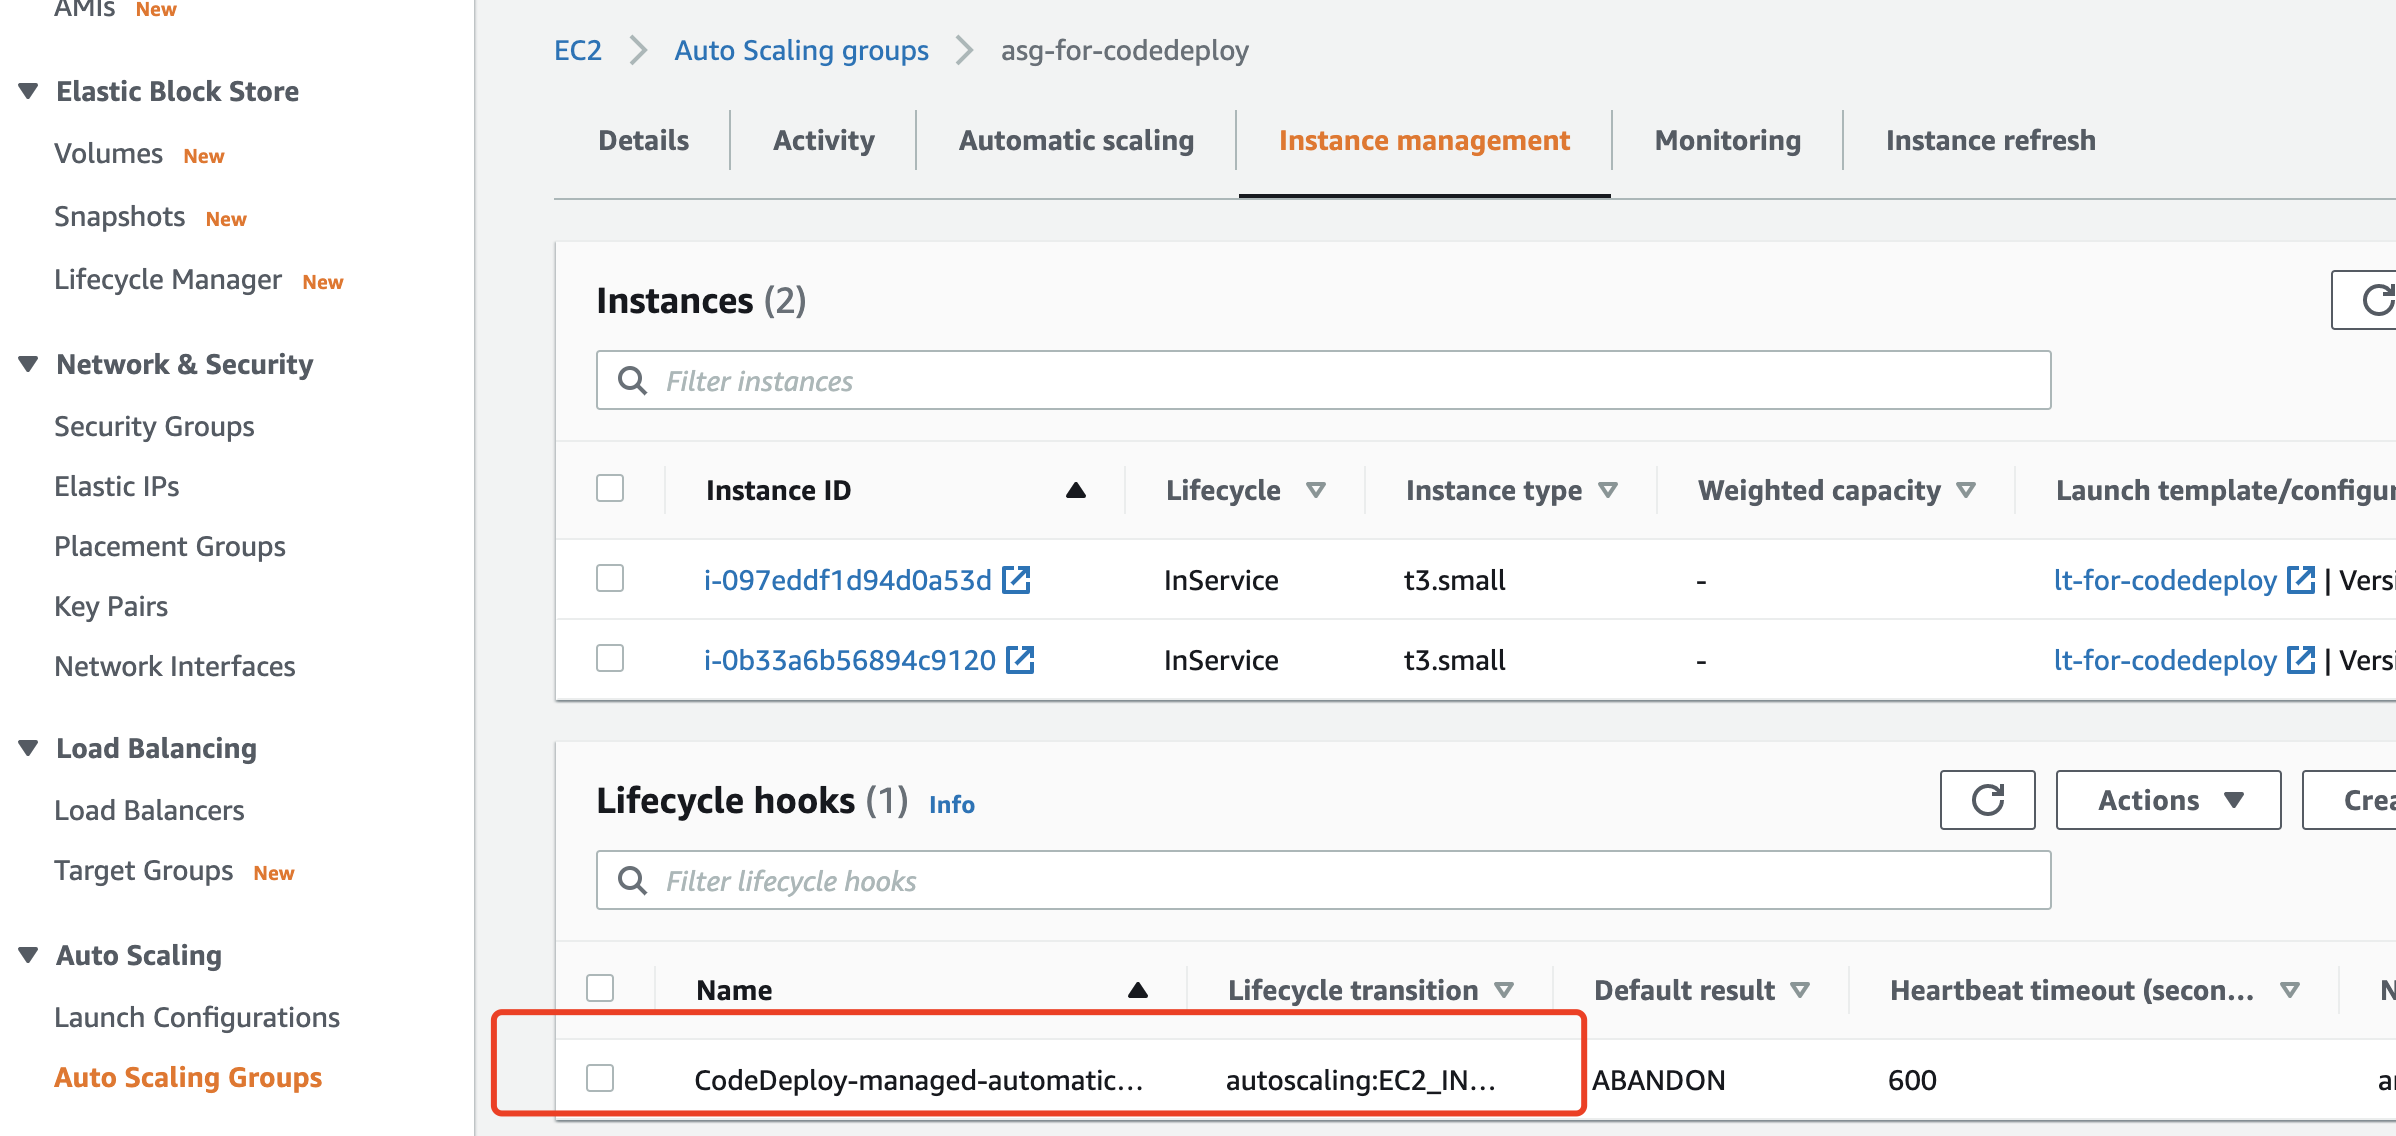
为了让CodeDeploy能够在ASG发生Scale-out事件时将应用部署到新到EC2上,CodeDeploy使用了Auto Scaling lifecycle hook,这个hook通知CodeDeploy发生了新的扩容事件,CodeDeploy必须将应用部署到新扩容的机器上。
这个hook是ASG上的概念,和CodeDeploy yaml文件中的hook不是同一个概念
当
When you create or update a deployment group to include an Auto Scaling group, CodeDeploy accesses the Auto Scaling group using the CodeDeploy service role, and then installs a lifecycle hook in the Auto Scaling group.
After CodeDeploy adds the lifecycle hook, how is it used?
After the lifecycle hook is installed, it is used during scale-out events. A scale-out event unfolds as follows:
- The Auto Scaling service (or simply, Auto Scaling) determines that a scale-out event needs to occur, and contacts the EC2 service to launch a new EC2 instance.
- The EC2 service launches a new EC2 instance. The instance moves into the
Pendingstate, and then into thePending:Waitstate. - During
Pending:Wait, Auto Scaling runs all the lifecycle hooks attached to the Auto Scaling group, including the lifecycle hook created by CodeDeploy. - The lifecycle hook sends a notification to the Amazon SQS queue that is polled by CodeDeploy.
- Upon receiving the notification, CodeDeploy parses the message, performs some validation, and starts to deploy your application to the new EC2 instance using the last successful revision.
- While the deployment is running, CodeDeploy sends heartbeats every five minutes to Auto Scaling to let it know that the instance is still being worked on.
- So far, the EC2 instance is still in the
Pending:Waitstate. - When the deployment completes, CodeDeploy indicates to Auto Scaling to either
CONTINUEorABANDONthe EC2 launch process, depending on whether the deployment succeeded or failed.- If CodeDeploy indicates
CONTINUE, Auto Scaling continues the launch process, either waiting for other hooks to complete, or putting the instance into thePending:Proceedand then theInServicestate. - If CodeDeploy indicates
ABANDON, Auto Scaling terminates the EC2 instance, and restarts the launch procedure if needed to meet the desired number of instances, as defined in the Auto Scaling Desired Capacity setting.
- If CodeDeploy indicates
How CodeDeploy names Amazon EC2 Auto Scaling groups
During blue/green deployments on an EC2/On-Premises compute platform, you have two options for adding instances to your replacement (green) environment:
- Use instances that already exist or that you create manually.
- Use settings from an Amazon EC2 Auto Scaling group that you specify to define and create instances in a new Amazon EC2 Auto Scaling group.
If you choose the second option, CodeDeploy provisions a new Amazon EC2 Auto Scaling group for you. It uses the following convention to name the group:
CodeDeploy_deployment_group_name_deployment_id
For example, if a deployment with ID 10 deploys a deployment group named alpha-deployments, the provisioned Amazon EC2 Auto Scaling group is named CodeDeploy_alpha-deployments_10. For more information, see Create a deployment group for an EC2/On-Premises blue/green deployment (console)
and GreenFleetProvisioningOption
.
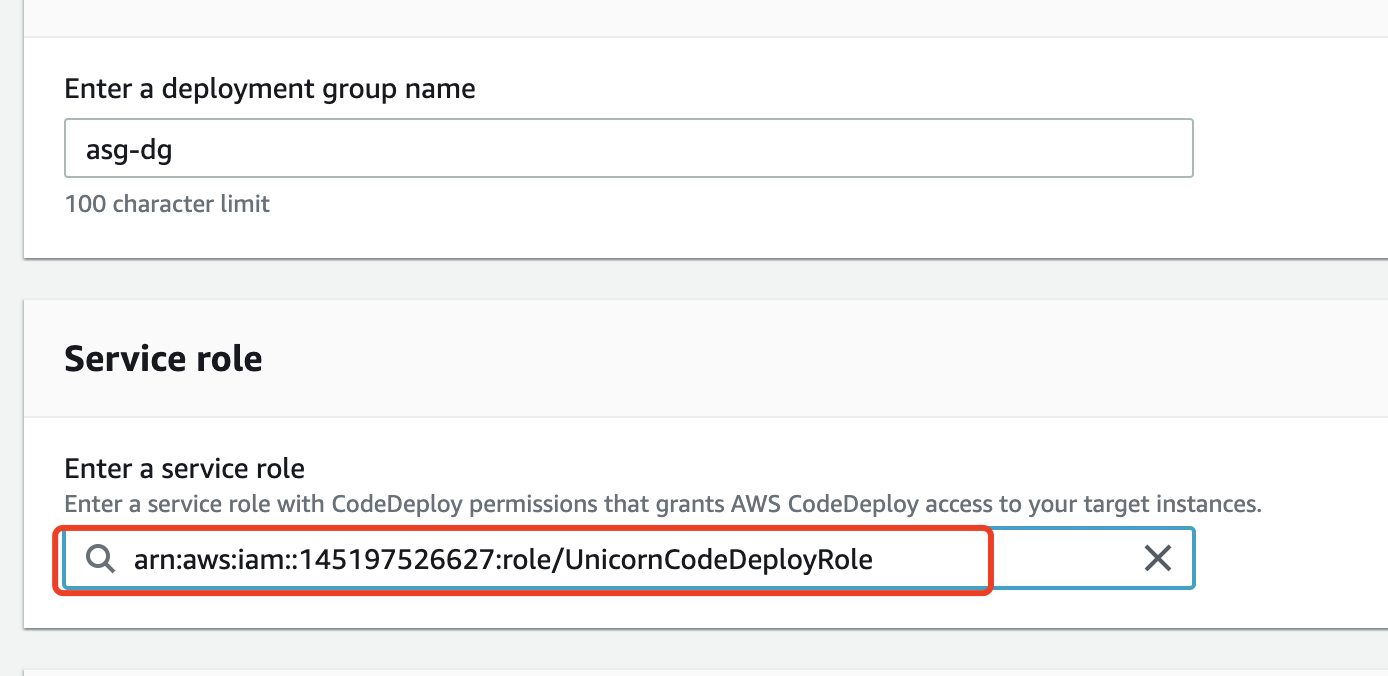
需要创建好一个IAM instance profile (CodeDeployDemo-EC2-Instance-Profile) 和 service role (CodeDeployDemo).
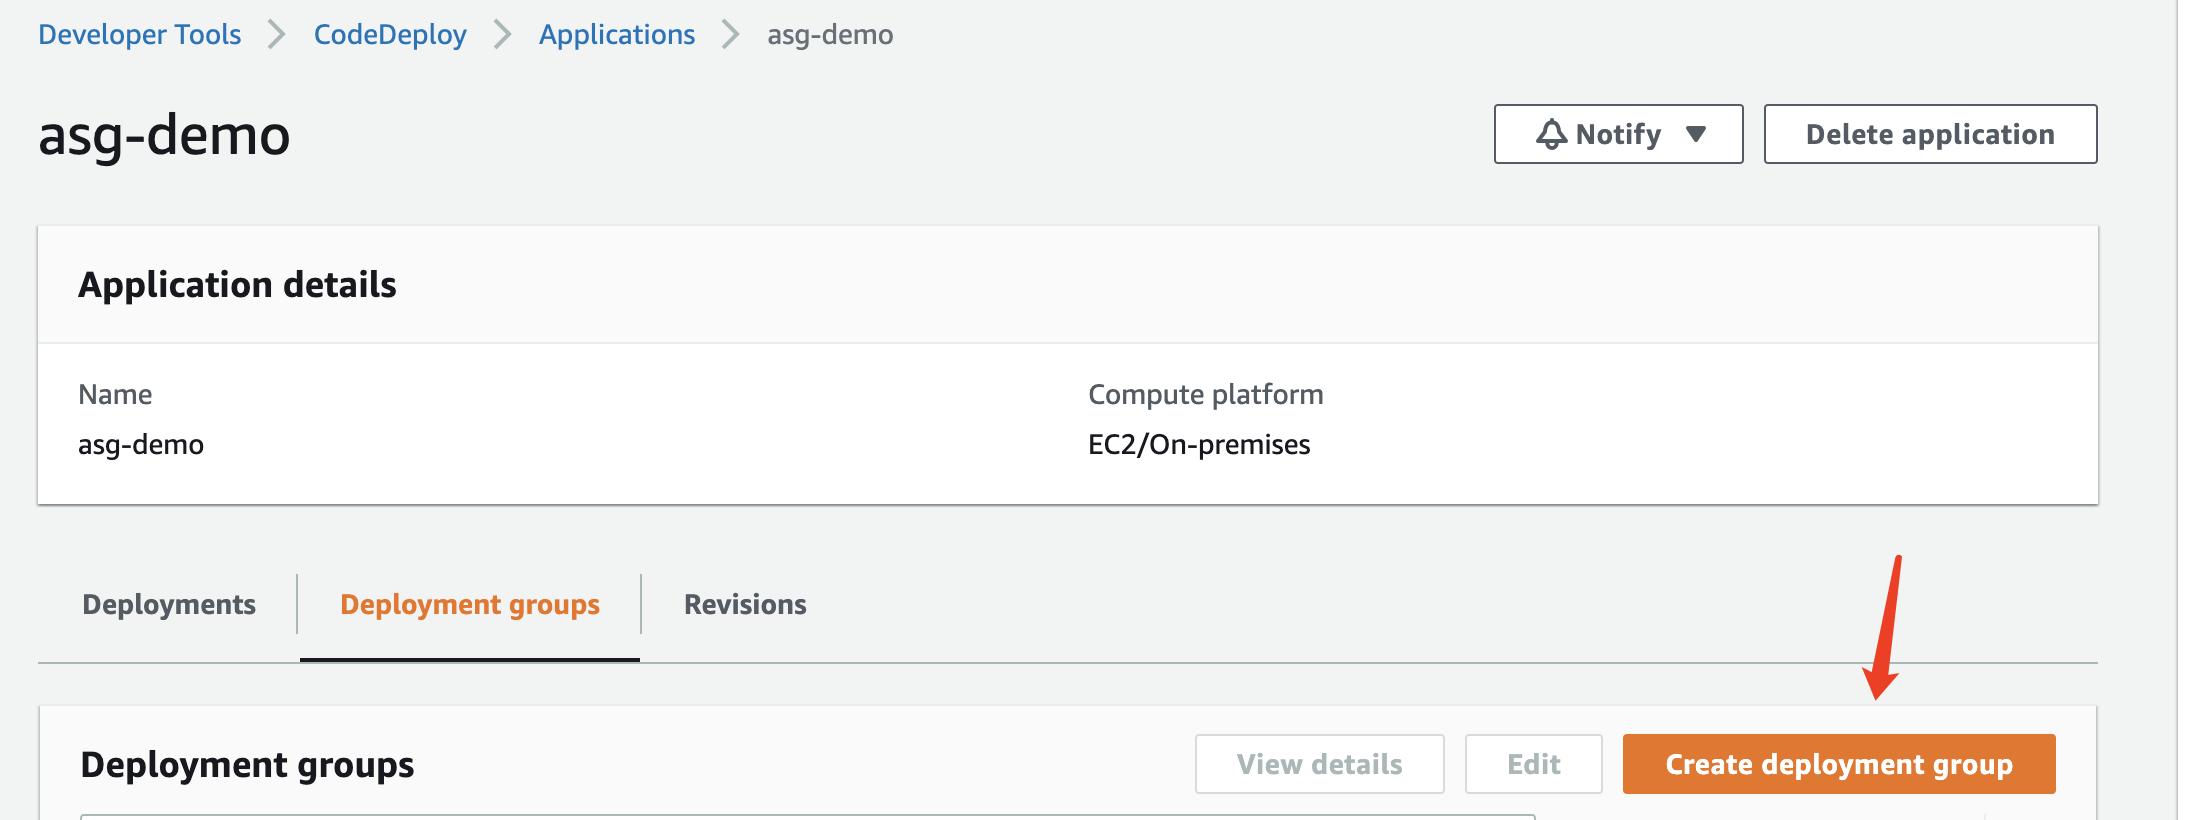
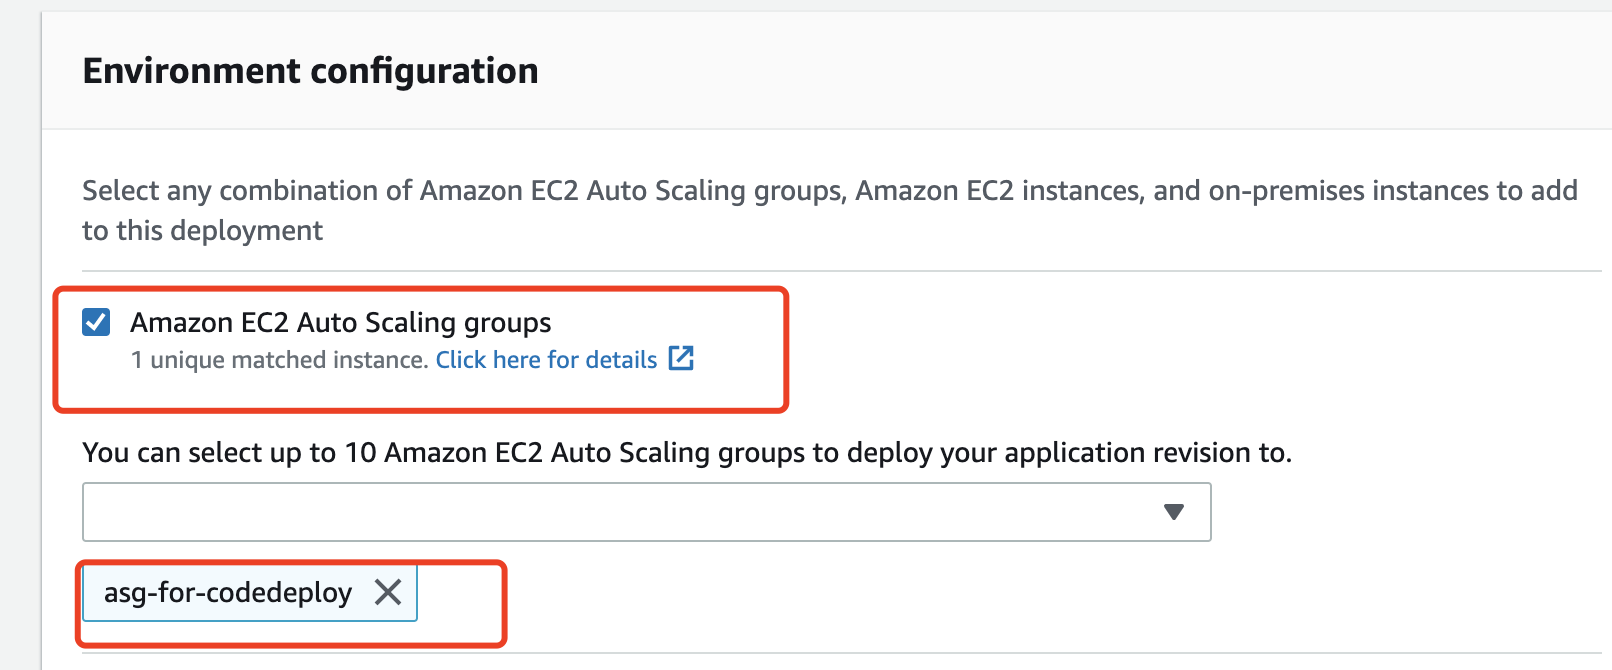
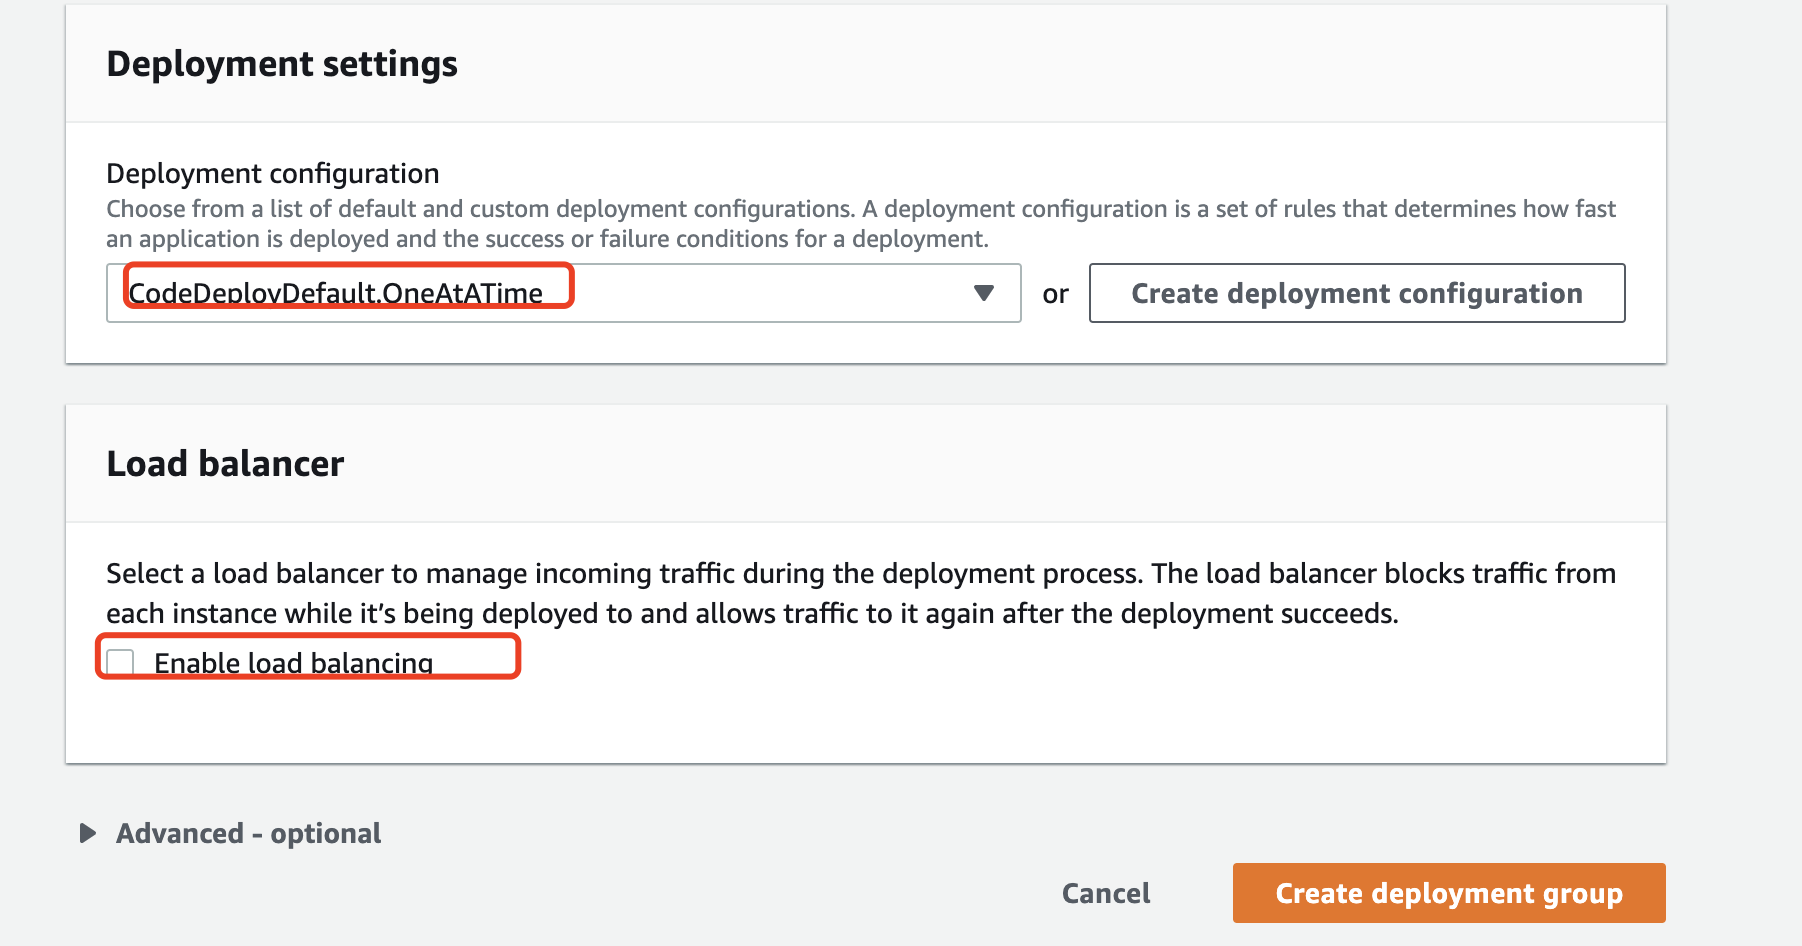
将应用部署到ASG中


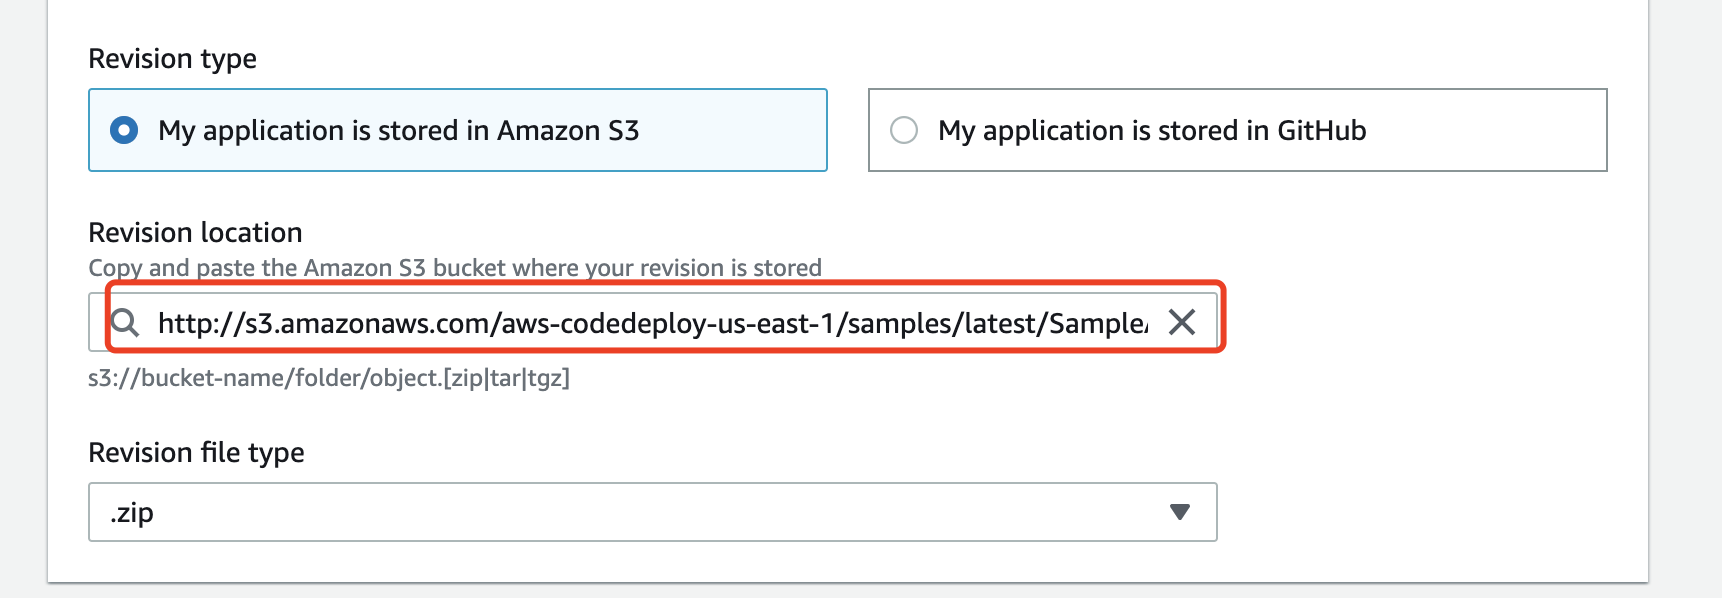
| Region | Location of sample application |
|---|---|
| US East (Ohio) Region | http://s3-us-east-2.amazonaws.com/aws-codedeploy-us-east-2/samples/latest/SampleApp_Linux.zip |
| US East (N. Virginia) Region | http://s3.amazonaws.com/aws-codedeploy-us-east-1/samples/latest/SampleApp_Linux.zip |
Note
If Failed appears instead of Succeeded, you may want to try some of the techniques in Monitor and troubleshoot your deployment
(using the application name of SimpleDemoApp and the deployment group name of SimpleDemoDG).
Step 3: Check your results
Step 4: Increase the number of Amazon EC2 instances in the Auto Scaling group
In this step, you instruct the Auto Scaling group to create an additional Amazon EC2 instance. After Amazon EC2 Auto Scaling creates the instance, CodeDeploy deploys your revision to it.
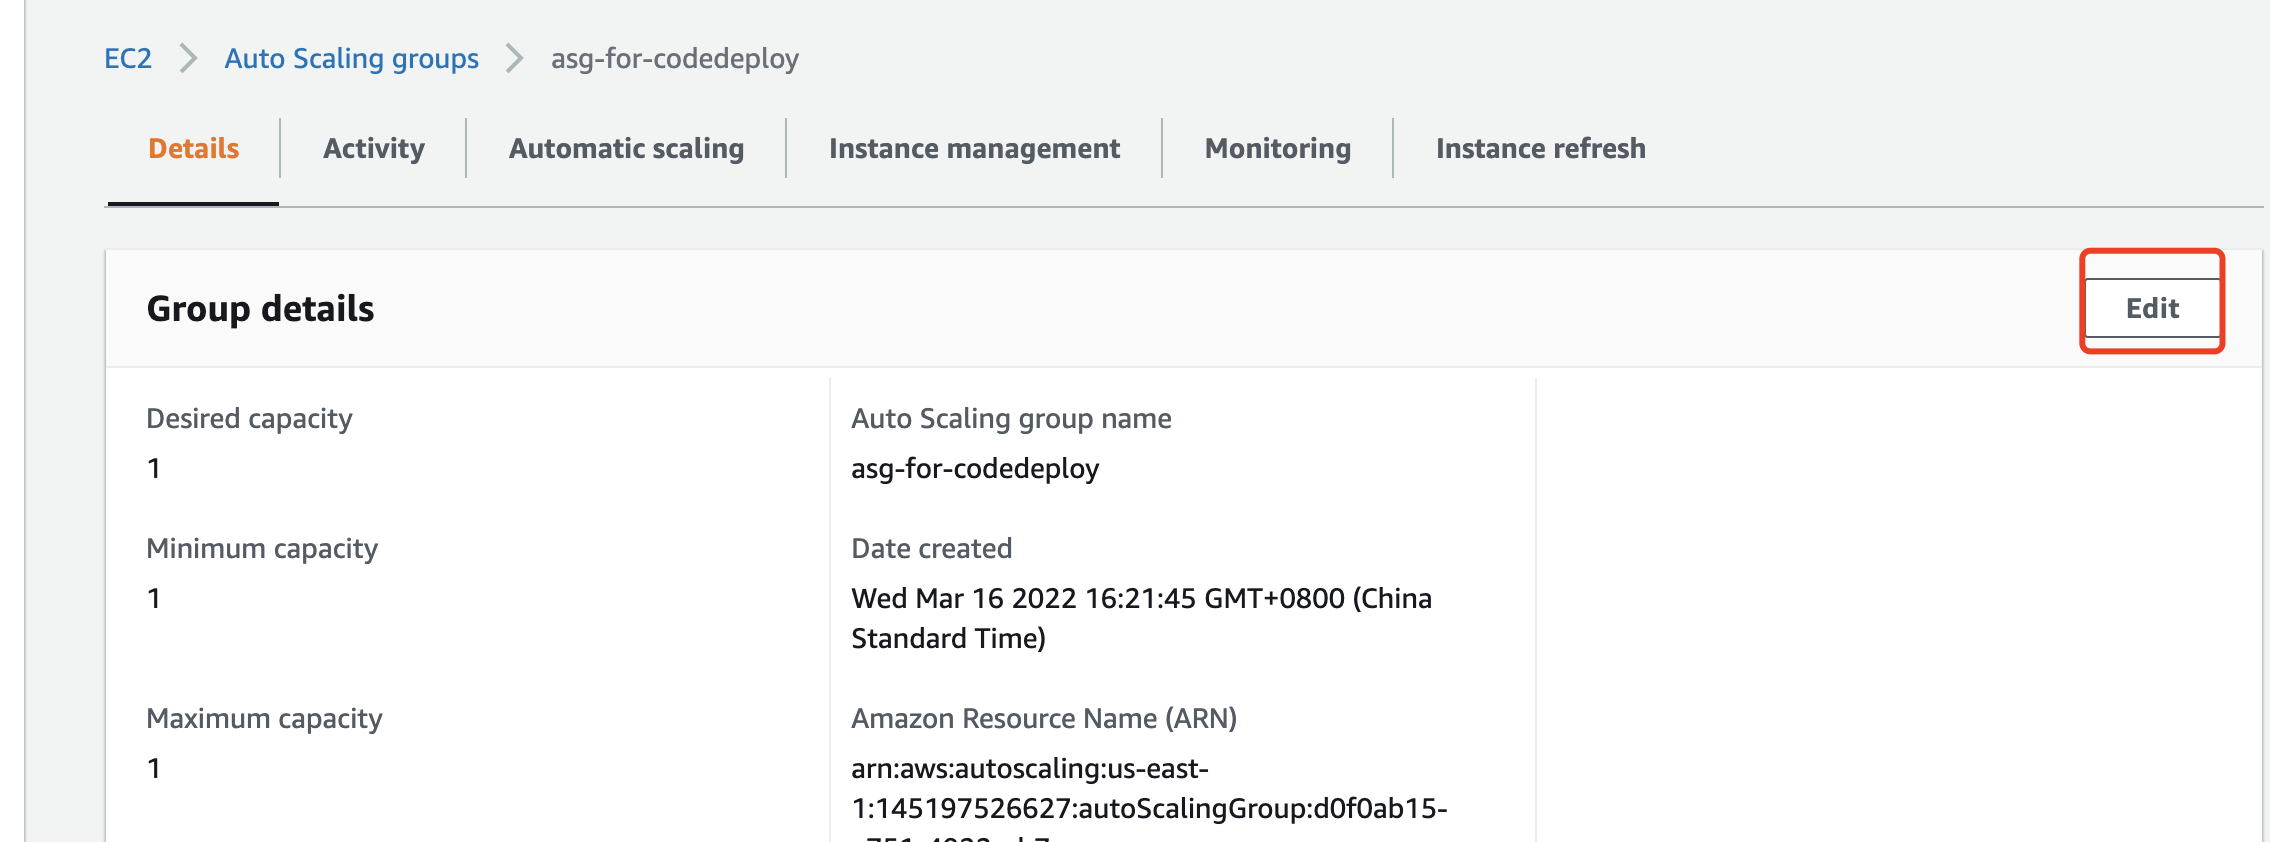
- In the Amazon EC2 navigation bar, under Auto Scaling, choose Auto Scaling Groups, and then choose
CodeDeployDemo-AS-Group. - Choose Actions, and then choose Edit.
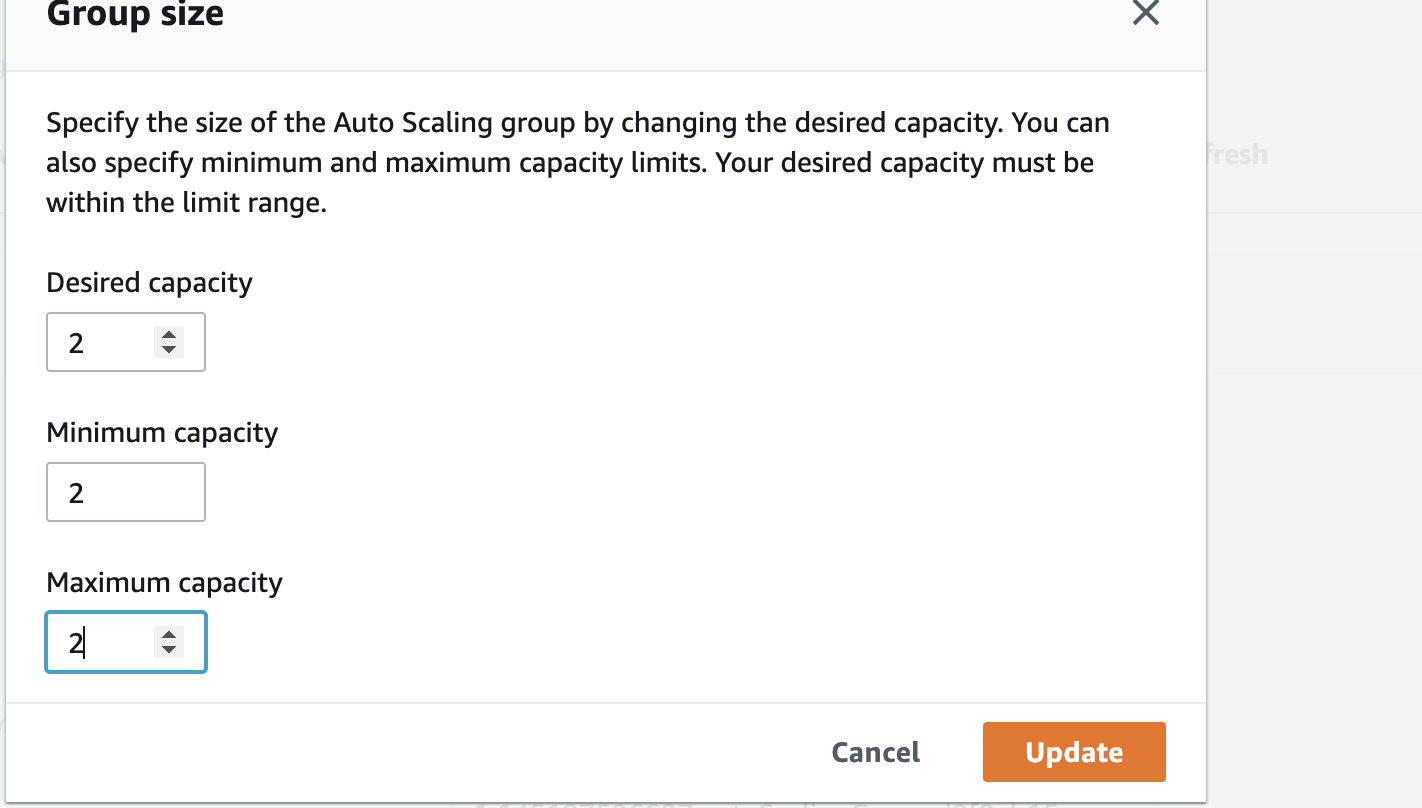
- On the Details tab, in the Desired, Min, and Max boxes, type
2, and then choose Save. - Choose the Instances tab. The new Amazon EC2 instance should appear in the list. (If the instance does not appear, you may need to choose the Refresh button a few times.) Do not proceed until the value of InService appears in the Lifecycle column and the value of Healthy appears in the Health Status column.
Step 5: Check your results again
In this step, you’ll check to see if CodeDeploy installed the SimpleDemoApp revision on the new instance in the Auto Scaling group.
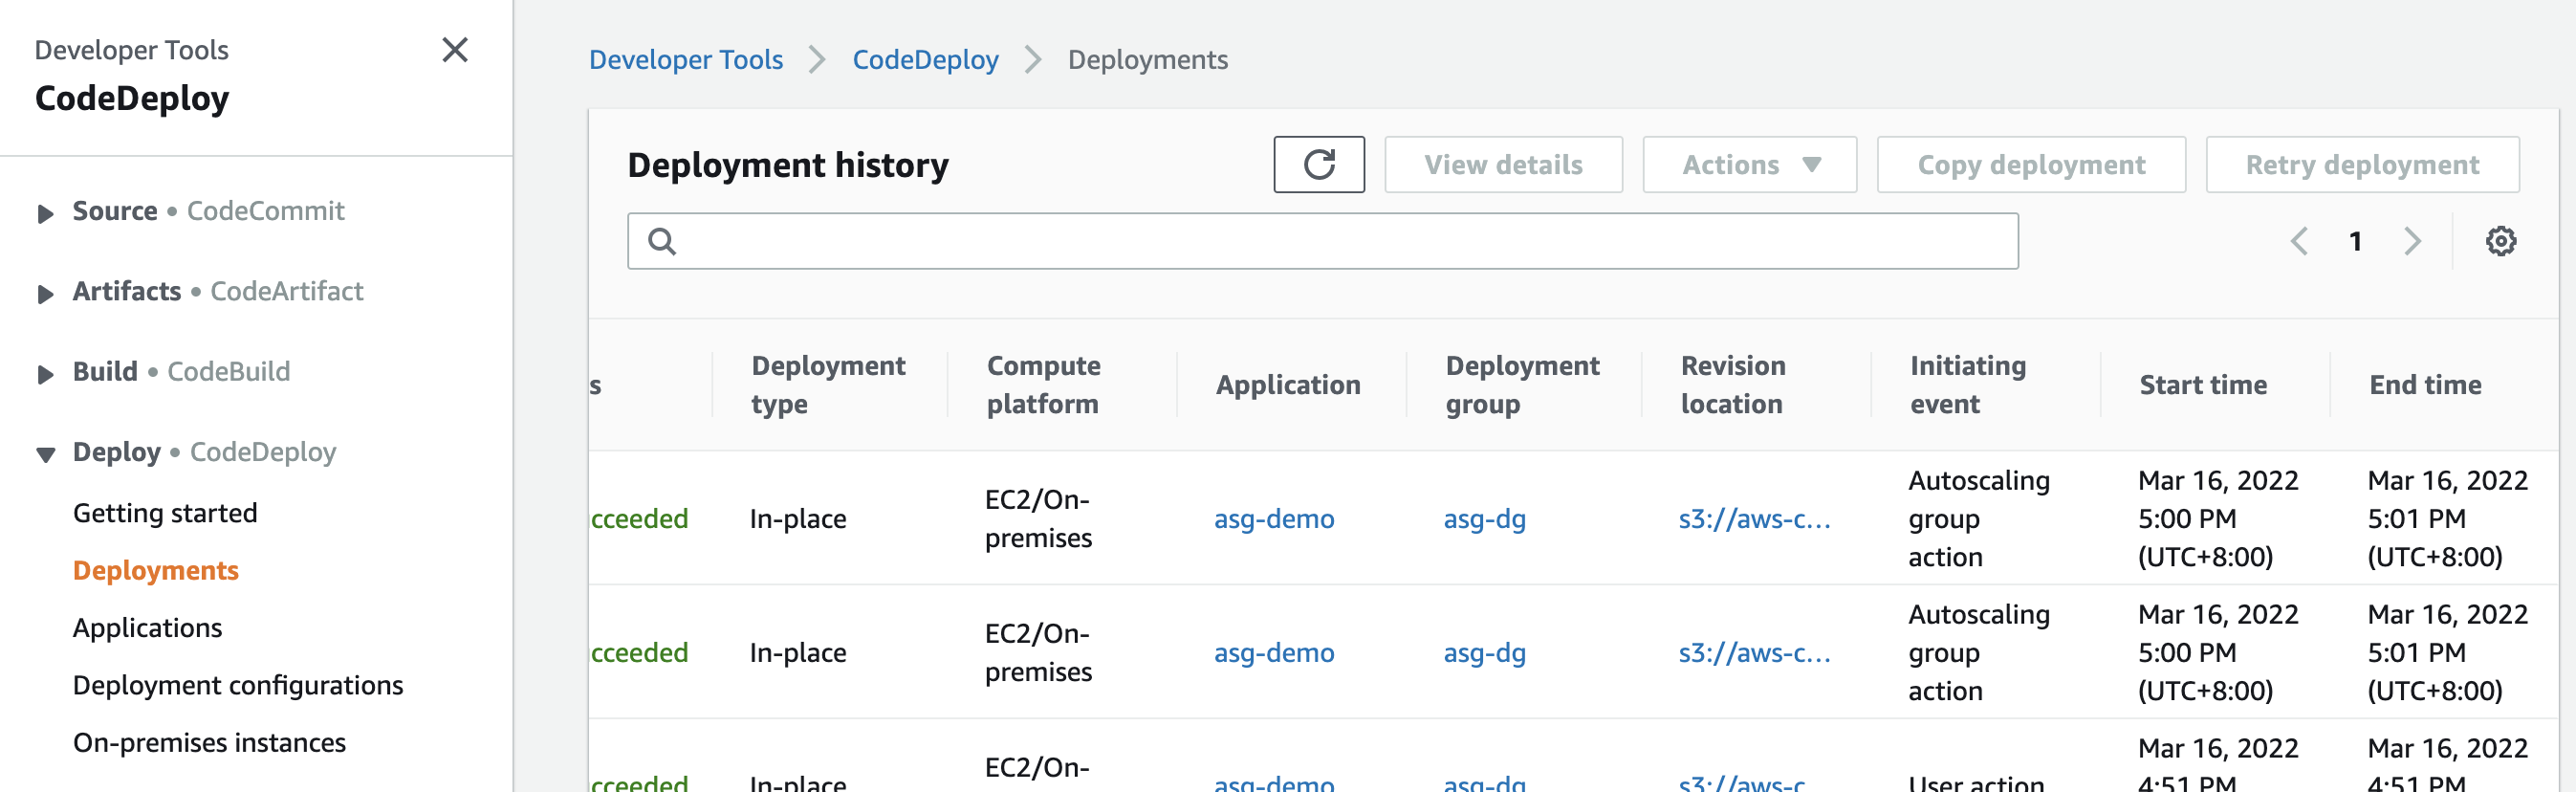
To check automatic deployment results (console)
-
Sign in to the AWS Management Console and open the CodeDeploy console at https://console.aws.amazon.com/codedeploy .
-
In the navigation pane, expand Deploy, and then choose Deployments.
-
Choose the deployment ID of the deployment that Amazon EC2 Auto Scaling created.
-
The Deployment page displays information about the deployment. Normally, you would create a deployment on your own, but Amazon EC2 Auto Scaling created one on your behalf to deploy your revision to the new Amazon EC2 instance.
-
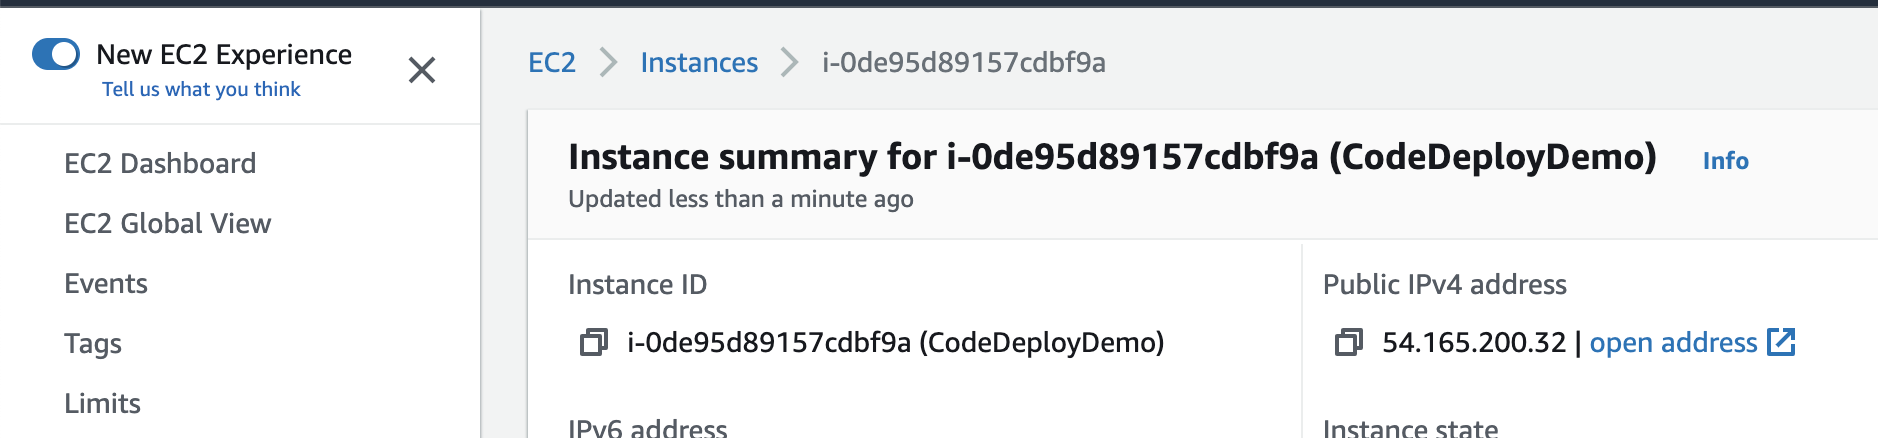
After Succeeded is displayed at the top of the page, verify the results on the instance. You first need to get the public DNS of the instance:
-
In the Amazon EC2 navigation pane, under Auto Scaling, choose Auto Scaling Groups, and then choose the
CodeDeployDemo-AS-Groupentry. -
On the Instances tab, choose the ID of the new Amazon EC2 instance.
-
On the Instances page, on the Description tab, note the Public DNS value. It should look something like this:
ec2-01-234-567-890.compute-1.amazonaws.com.
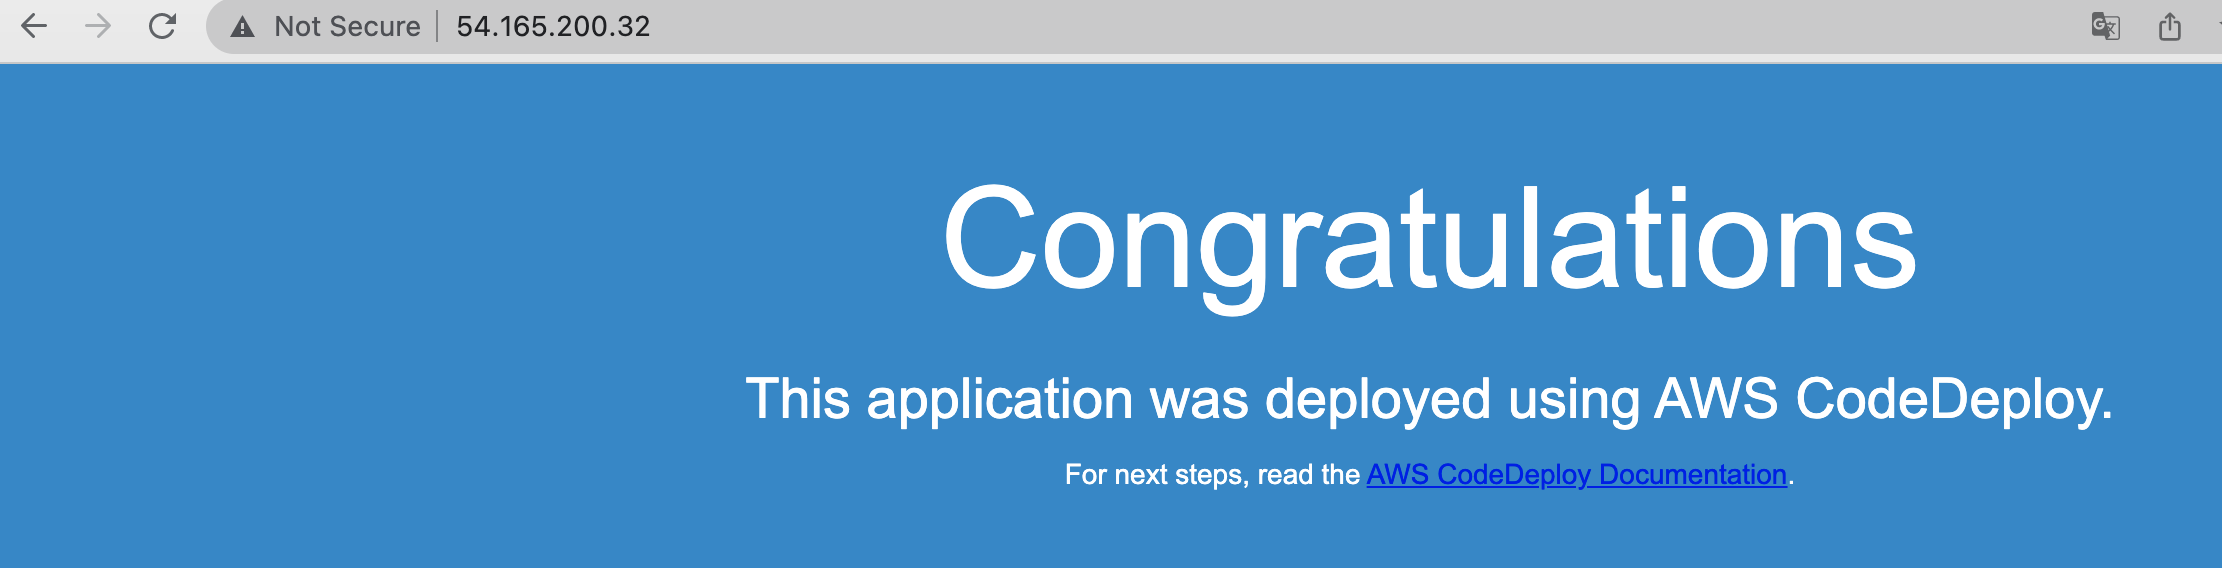
Show the SimpleDemoApp revision deployed to the instance using a URL like the following:
http://ec2-01-234-567-890.compute-1.amazonaws.com
If the congratulations page appears, you’ve used CodeDeploy to deploy a revision to a scaled-up Amazon EC2 instance in an Auto Scaling group!